Pick your shelter by terrain, weather patterns, and local insect populations. A double-wall tent provides a predictable microclimate with a sealed perimeter, keeping out ground runoff, crawling pests, and windblown spray. A tarp shelter strips shelter down to tensioned fabric and ambient air, cutting base weight while requiring active terrain reading and knot work. Neither tool fits every trip, and selecting the wrong system turns routine nights into sleepless battles against damp gear or biting flies.
Making an informed decision demands looking past marketing claims about ultralight survival and examining mechanical reality. Tents carry their own structure through aluminum or carbon fiber poles, giving them a consistent footprint regardless of ground density. Tarps shift structural loads onto trekking poles, root systems, and well-driven stakes. When selecting gear for an upcoming route, evaluate bug pressure, pack capacity, wind exposure, moisture management, and storm pitching before committing to a system.
Evaluate Site Bug Pressure
Insect activity dictates shelter choice faster than rainfall. In regions with dense mosquito, blackfly, or midge populations, an open tarp pitch invites sleeplessness. Biting insects track carbon dioxide plumes directly into open shelters. A standard double-wall tent relies on an inner canopy built from 15D or 20D noseeum mesh with approximately 600 holes per square centimeter. This barrier blocks insects smaller than one millimeter without requiring chemical repellents or specialized head nets while you sleep.
If you run a tarp in buggy territory, you must carry secondary containment. This means adding an ultralight bug bivy, an insect net canopy, or a perimeter mesh skirt. A standalone perimeter net or bivy adds 170 to 340 grams to your kit, which narrows the weight gap between a flat tarp and a dedicated ultralight trekking-pole tent. For tick-heavy brush zones, an open tarp without a floor creates constant risk. Ticks questing on low vegetation easily crawl over unsealed groundsheets onto quilts and sleeping pads.
Spiders, scorpions, and biting ants also alter the balance. In desert scrub, scorpions seek out warm bodies and shaded depressions under groundcloths. A fully enclosed tent floor with an 8-centimeter bathtub wall stops crawling invertebrates from entering your sleep space. When using a flat tarp in these environments, ground selection requires sweeping the soil clear of burrows, detritus, and ant colonies before laying down a polycro or Tyvek sheet.
| Bug Pressure Level | Primary Insect Threats | Recommended Shelter System | Added Weight Penalty |
|---|---|---|---|
| Low | Occasional spiders, early season flies | Flat tarp with polycro groundsheet | 0 grams |
| Moderate | Dispersed mosquitoes, wood ticks | Shaped tarp with ultralight bug bivy | 170 to 250 grams |
| Severe | Dense blackflies, midges, swarming mosquitoes | Double-wall tent or tarp with full mesh inner | 310 to 450 grams |
| Arid / Ground Crawlers | Scorpions, centipedes, fire ants | Enclosed bathtub floor tent | Dependent on tent spec |
Measure Weight Against Packed Volume
Tarps dominate the weight calculation on paper. A flat 2.4-by-3-meter silpoly tarp weighs roughly 310 to 390 grams, while a 0.51 oz Dyneema Composite Fabric (DCF) version drops below 230 grams. In contrast, a standard two-person freestanding double-wall tent ranges from 1300 to 2100 grams, and ultralight trekking-pole tents land between 650 and 950 grams. If baseline trail weight is your primary metric, a bare tarp system provides an immediate saving of at least 400 grams over most enclosed shelters.
Packed volume tells a different story inside your rucksack. Freestanding tents contain pole segments that measure 38 to 46 centimeters when collapsed. These rigid poles force vertical packing inside the main pack bag or external lashings on side pockets. A flat tarp lacks rigid components entirely. You can fold, roll, or stuff it into a 1.2-liter compression sack, squeezing it into dead space around food bags or sleeping quilts. This reduction lets you downsize from a 55-liter pack to a 38-liter pack for three-season weekend trips.
Account for supplementary items before declaring a tarp the clear winner. A raw tarp requires an auxiliary ground cloth to protect your sleeping pad from punctures. Tyvek adds 110 to 140 grams; 2-mil polycro adds 45 to 60 grams. You will also need 8 to 12 stakes rather than the 4 to 6 required by a semi-freestanding tent, adding another 90 to 140 grams in aluminum or titanium hardware. When you combine a tarp, groundsheet, bivy, extra cordage, and heavy-duty stakes, total kit mass frequently climbs to 680 or 750 grams.
Compare Pitch Stability in High Wind
High winds expose the fundamental mechanical difference between structural frames and fabric tension. Freestanding tents rely on crossed poles under pre-stress. When a 40 mph gale hits a dome or semi-geodesic frame, the poles flex inward to absorb energy, then spring back into shape once the load passes. The structure maintains a protected internal volume even if the stakes experience minor shifting in loose soil.
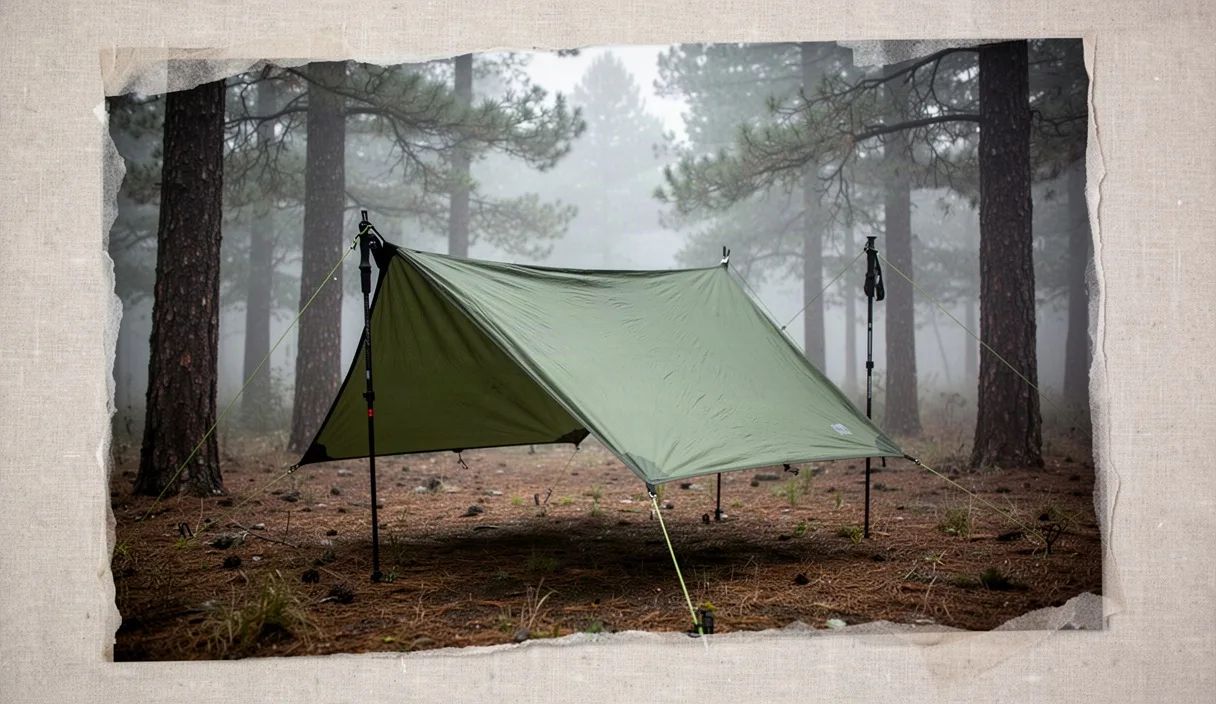
Tarp stability depends entirely on line tension, fabric shear strength, and ground anchor resistance. A flat tarp pitched in a broadside A-frame acts like a sail. If a 35 mph wind catch the broadside face, it places massive pulling force on your windward stakes. To survive alpine or exposed coastal winds with a tarp, you must adapt your pitch to the conditions:
- The Half-Pyramid Pitch: Stake the back edge directly into the ground, raise a single center pole, and peg the front wings low. This creates a low-profile wedge that deflects wind up and over the shelter.
- The Low A-Frame: Drop your ridge line to 75 centimeters above the soil and peg the bottom hems flush to the turf, eliminating under-canopy wind catch.
- The Lean-To: Anchor one entire long edge into the dirt facing the prevailing wind, using the fabric as a ramp to direct air over your sleep zone.
Ground composition dictates tarp success in storms. If you pitch on deep sand, loose river gravel, or waterlogged peat, standard 15-centimeter tent pegs will pull loose under continuous dynamic loading. Tarp survival in high winds demands mastery of deadman anchors, using buried logs, heavy flat boulders, or snow anchors. If an anchor pulls out on a tent, the shelter deforms; if an anchor pulls out on a tarp under heavy wind, the entire structure collapses immediately.
Handle Condensation Inside Single Walls
An adult body exhales and perspires between 300 and 500 milliliters of water vapor during an eight-hour night. That moisture moves through the shelter air until it strikes a surface cooled below the local dew point. In a double-wall tent, this water vapor migrates through the porous inner mesh and condenses on the underside of the outer waterproof fly. When droplets form and run down, or shake loose in morning gusts, the mesh inner keeps them away from your sleeping bag.
Tarps function as single-wall barriers. Condensation collects directly on the underside of the tarp fabric, positioned 30 to 90 centimeters above your sleeping face. If you bump the underside while sitting up, or if strong gusts snap the fabric, moisture showers down into your insulation. Down sleeping bags lose loft and thermal efficiency when their outer shell absorbs this water, making daily condensation management a safety priority in sub-freezing or extended wet environments.
You control tarp condensation through site selection and active ventilation. Because tarps do not have a sealed floor, ambient air flows continuously beneath the eaves, whisking away humid air before it hits the fabric. Keep these rules in mind to manage moisture:
- Avoid flat depressions, hollows, and meadows directly adjacent to lakes or marshes where cold, saturated air pools at night.
- Camp under mature forest canopies, which radiate thermal energy down and keep ground temperatures 2 to 4 degrees higher than open clearings, lowering condensation risks.
- Maintain a minimum gap of 15 centimeters between the lower hem of the tarp and the ground on the leeward side to facilitate cross-drafting.
- Carry a 20-gram synthetic microfiber cloth to wipe down the inside ceiling of the tarp before packing up in the morning.
Assess Setup Speed During Rain
Setting up in an active downpour tests gear design to its limits. Traditional double-wall tents that pitch inner-first pose serious issues in torrential rain. You must lay out the breathable mesh inner, assemble the pole skeleton, clip the mesh to the poles, and throw the rainfly over the top. During those two to three minutes of exposure, water saturates the floor and mesh, leaving you with a wet sleeping space before you even unpack your gear.
A tarp allows dry-pitching under all circumstances. You anchor the windward corners or run a continuous ridge line between trees, unfurl the waterproof tarp directly overhead, and secure it. Your living footprint stays shielded from rain within 60 seconds. Once the overhead cover is established and shedding water, you can kneel beneath it to roll out your dry groundsheet, blow up your sleeping pad, and unpack your dry clothing without exposing sensitive insulation to falling rain.
Outer-first pitching also simplifies morning departures. With a tarp, you pack your sleeping bag, clothing, and groundsheet into your dry pack liner while protected under the canopy. You hoist the packed rucksack, buckle the hip belt, and step out into the rain. Striking the tarp takes 45 seconds: pull stakes, unhook lines, roll the wet silpoly, and slide it directly into an exterior mesh pocket. The inside of your backpack remains entirely dry.
| Action in Heavy Rain | Inner-First Tent | Tarp Shelter System |
|---|---|---|
| Setup Speed | 3 to 5 minutes | 1 to 2 minutes with experience |
| Living Space Protection | Inner often wets out during setup | Protected before groundsheet is unpacked |
| Strike Efficiency | Pack must remain open to receive tent body | Pack loaded under canopy before tarp is struck |
| Wet Gear Segregation | Wet fly packs near dry inner fabric | Wet tarp stores in exterior mesh pocket |
Common Mistakes
Choosing a shelter without testing its specific constraints causes most trail failures. Watch out for these four frequent errors:
- Relying on low-quality groundcloths under tarps: Standard blue polyethylene hardware tarps add needless bulk, while fragile plastic wraps tear on gravel beds. Use commercial-grade 2-mil cross-laminated polycro or hard-structure Tyvek.
- Overestimating forest availability: Carrying a tarp without trekking poles assumes you will always find well-spaced, sturdy trees. If your route climbs above tree line or enters scrub desert, you have no ridge-line anchors and will struggle to construct a rigid shelter.
- Pitching in drainage runoffs: A bathtub floor protects you from shallow surface sheets of water during cloudbursts. A tarp offers zero ground protection against rushing water. Pitching an open tarp in a slight grade hollow guarantees soaked gear by 02:00.
- Skipping seam sealing: Many flat silnylon and silpoly tarps arrive unsealed from the manufacturer. Failing to brush silicone sealant along stitch lines before your first field run causes immediate, steady drips along the central ridge seam.
Next Steps for Shelter Selection
Start by auditing your realistic camping conditions over the last two seasons. If your trips focus on high-alpine passes above the tree line, cold sub-alpine zones with high wind exposure, or summer trips in blackfly country, purchase a dedicated two-wall tent or a shaped hybrid mid shelter. The mechanical protection and insect barriers outshine any minor weight penalty.
If you hike mainly below the tree line in moderate seasons, purchase an affordable 2.4-by-3-meter silpoly flat tarp and 15 meters of 2mm reflective guyline. Take it to a local park or your backyard. Practice pitching an A-frame, a lean-to, and a half-pyramid using trekking poles set to 115 and 125 centimeters until you can tension each shape in under three minutes.
Review the manufacturer documentation on your existing equipment. Check the waterproof hydrostatic head rating of your shelter fabrics. A floor needs at least a 2000 mm rating to resist groundwater seepage under knee pressure, while a fly or tarp requires 1200 mm to 1500 mm to shed wind-driven rain safely. If you plan to hike through areas with regulated wildlife, tick-borne infection risks, or extreme winter precipitation, consult a local ranger station or wilderness professional about regional shelter requirements before packing your kit.