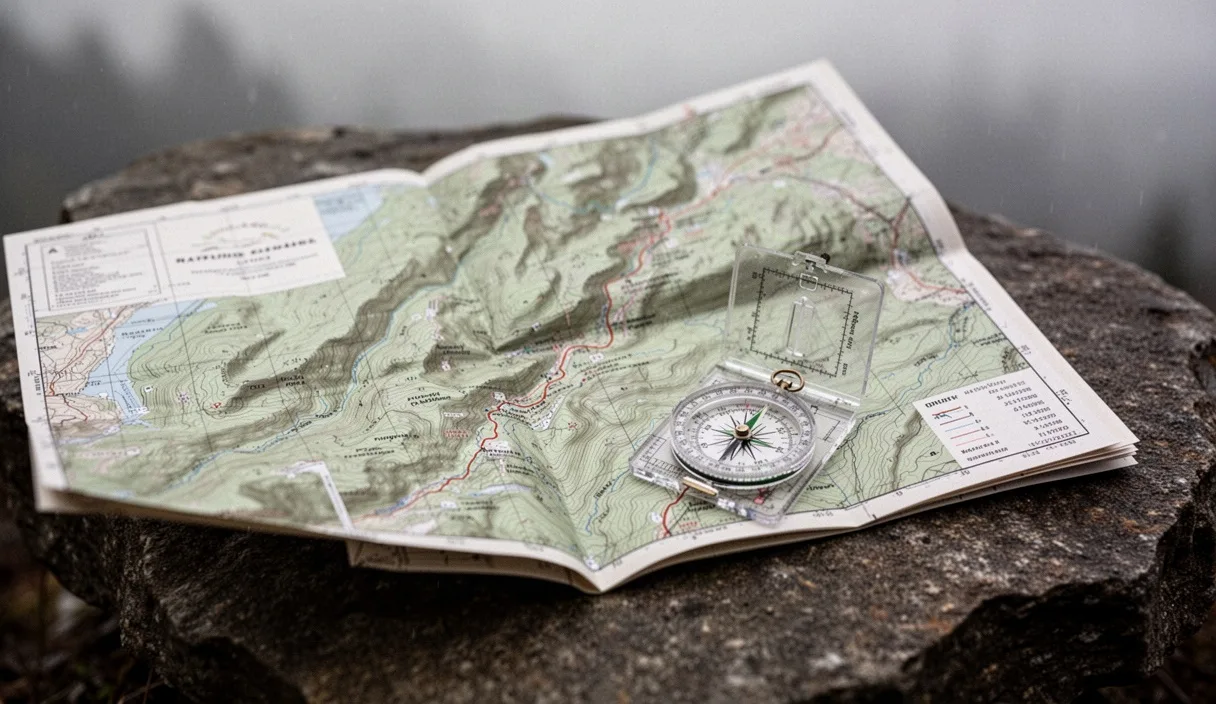
Dead phone batteries end hikes unexpectedly. When a handheld satellite device dies or cold weather drains a lithium battery in thirty minutes, paper navigation is your only reliable backup. A standard 7.5-minute topographic map does not crash, lose signal in deep canyons, or require firmware updates. It gives you an uncompressed, high-resolution view of the terrain that no two-inch screen can replicate.
Topographic literacy relies on geometry, visual pattern recognition, and honest math. You must translate two-dimensional squiggles into three-dimensional rock, dirt, and water. By pairing a physical map with an adjustable baseplate compass, you can pinpoint your location within forty yards without electronic assistance. The process requires steady patience and disciplined observation of the ground under your boots.
Interpret Contour Line Density and Cliffs
Contour lines connect points of equal elevation above sea level. Check the map margin first to locate the contour interval, which is the vertical distance between adjacent lines. On a standard United States Geological Survey (USGS) 1:24,000 scale map, this interval is typically 40 feet in mountainous areas or 20 feet in flatter regions. On 1:50,000 Canadian National Topographic System sheets, intervals are commonly 10 or 20 meters. Every fifth line is an index contour, printed heavier and darker with the exact elevation number printed along its trace.
Line spacing tells you the angle of the slope. Lines spaced far apart indicate flat meadows, gentle river plains, or wide plateau tops. As the lines draw closer together, the terrain steepens rapidly. When contour lines merge into a single solid black or brown stripe, you are looking at a vertical or near-vertical cliff. If an index line sits adjacent to four intermediate lines packed together within one millimeter on the paper, the slope exceeds a 45-degree angle. Traveling through such zones requires scrambling or technical climbing gear rather than a casual stroll.
Contour shapes reveal distinct landforms. Memorize these two fundamental geometric rules to read the landscape instantly:
- Valleys and drainages: Contour lines form V-shapes that point upstream toward higher elevation. Water flows out of the point of the V toward the wider opening. If you are lost and need to locate a stream, walk toward the apex of these patterns.
- Ridges and spurs: Contour lines form U-shapes or rounded V-shapes that point downhill toward lower elevation. The highest ground runs directly through the center of the bend, falling away on three sides.
- Summits and peaks: Closed, concentric circles or ovals indicate a high point. The innermost ring marks the summit area.
- Depressions: Closed rings with tiny tick marks (hachures) pointing inward indicate a sinkhole, dry crater, or mining pit. Elevation drops as you move past the outer ring into the center.
| Map Pattern | Physical Landform | Foot Travel Difficulty |
|---|---|---|
| Widely separated lines (over 5 mm apart) | Valley floor, meadow, or plateau | Fast, open walking; minimal elevation strain |
| Evenly spaced parallel lines (1 to 2 mm apart) | Uniform hillside or sustained headwall | Steady upward grind; switchbacks required |
| Pinched, stacked, or merged lines | Rock wall, bluff, or impassable cliff band | Requires technical bypass or roped climbing |
| Concentric rings with inward hachure ticks | Karst sinkhole, crater, or basin | Unstable footing; difficult exit on loose scree |
| V-shapes pointing toward lower numbers | Descending ridgeline or spur | Good visibility, exposed to wind and lightning |
Adjust Compass Rings for Regional Declination
Maps point toward True North, which is the geographic North Pole where lines of longitude converge. Compass needles point toward Magnetic North, a shifting zone in the Canadian Arctic controlled by the Earth's magnetic core. The angular difference between these two points is magnetic declination. If you fail to account for this difference, a heading that looks correct on paper will pull you off course by hundreds of yards for every mile you walk.
Find the declination diagram in the lower margin of your map sheet. It features three arrows labeled MN (Magnetic North), GN (Grid North), and an asterisk or star representing True North. In the western United States, declination is East, meaning the needle points east of True North. In the Cascade Range of Washington, declination averages 15 degrees East. In the eastern United States, declination is West. In the White Mountains of New Hampshire, it sits near 14 degrees West. Declination drifts over time, so verify the map print date or check current values via the National Oceanic and Atmospheric Administration database.
Set your compass to eliminate manual math in the field. A quality outdoor compass features an adjustable internal scale on the bottom of the liquid capsule:
- Locate the small adjustment screw or brass slot on the back or rim of the compass housing.
- Insert the adjustment key attached to the compass lanyard, or use the corner of a flathead screwdriver.
- Turn the screw until the orienting arrow inside the capsule aligns with your local declination value on the graduated scale.
- For 15 degrees East declination, turn the orienting arrow 15 degrees to the east (right) of the zero mark.
- Once locked, your compass automatically converts magnetic readings to map bearings. The needle points to Magnetic North, but the orienting arrow and grid lines match True North on the paper.
If your compass lacks an adjustable housing, you must calculate the offset manually. When converting a bearing taken from a map to a field heading in an area with East declination, subtract the declination value. In an area with West declination, add the value. When transferring a field bearing back onto the paper map, reverse the math: add East, subtract West. A wrong calculation sends you in the wrong direction, so an adjustable compass housing is well worth the investment.
Orient the Paper Sheet to Natural Terrain
Orienting a map means aligning the paper so that north on the sheet points to true north on the ground. Once oriented, every valley, peak, and drainage line printed on the map mirrors the exact direction of the physical features surrounding you. Do this every time you pull the map from your pack.
Orienting with a declination-corrected compass takes twenty seconds. Lay the map flat on a level boulder or clean dirt patch. Set your compass dial to 0 degrees (True North). Place the long straight edge of the compass baseplate along any North-South grid line or the outer side border of the map, with the direction-of-travel arrow pointing toward the top of the sheet. Hold the baseplate firmly against the paper and rotate both the map and compass together until the red magnetic needle swings directly into the red orienting arrow outline (put "red in the shed"). The map is now fully aligned with the landscape.
Keep your compass away from local magnetic interference while orienting. Trekking poles with steel tips, steel knife blades, iron-rich basalt rocks, and the magnetic clips on hydration bladders will deflect the needle by several degrees. Check the ground for dark volcanic boulders before resting the compass on a rock surface.
You can also orient the map using terrain association without a compass if visibility is clear. Unfold the map and locate your rough position. Identify two or three distinct landmarks in the real world: a sharp, rocky horn to the west, a broad saddle to the north, and a creek confluence below. Turn the paper sheet until the symbols for those landmarks align directly with the lines of sight to the real objects. This visual lock lets you cross-check your location by shooting reverse bearings across the peaks.
Pick Linear Handrails and Catching Features
Off-trail navigation does not mean staring down at your compass needle every five steps. Doing so leads to wandering, ankle rolls, and exhaustion. Expert navigators use prominent landforms to guide their travel and catch them if they stray off target.
A handrail is any continuous, recognizable linear feature that runs parallel to your intended route. Instead of pacing through dense timber on an arbitrary compass heading, pick a handrail and follow it. Reliable handrails include:
- Drainage systems: Creeks, dry gullies, and river corridors provide definitive paths, though bank vegetation can be thick.
- Ridge crests: Narrow, well-defined spurs offer firm walking and expansive views, keeping you above dense brush.
- Contour intervals: In open terrain, you can maintain a single elevation line along the side of a mountain, using your altimeter or visual leveling to avoid climbing or dropping.
- Vegetation edges: The distinct boundary where old-growth coniferous forest meets an avalanche chute or alpine boulder field.
A catching feature (also called a backstop) is a prominent, unmistakable landmark running perpendicular to your direction of travel. You select a catching feature that sits behind your target objective. If you miss the objective in poor weather or thick timber, the catching feature stops you before you wander into danger.
Consider an example: you want to find an old cabin hidden in a dense pine basin 1.5 miles away. Directly behind the cabin, 300 yards further south, sits a roaring glacial river cutting across the valley floor. The river is your catching feature. You hike south toward the cabin. If your boots hit water, you have walked too far. You stop, confirm your position at the riverbank, turn 180 degrees north, and search the remaining 300-yard buffer to locate the shelter.
Always aim off when approaching small targets on linear backstops. If you try to strike a trail bridge by marching straight toward it across a mile of featureless swamp, a two-degree error puts you on the bank without knowing whether the bridge is left or right of your position. Deliberately aim 150 yards to the left of the bridge. When you hit the riverbank, you know with absolute certainty that you must turn right and walk upstream to find the crossing.
Calculate Travel Time by Elevation Gain
Distance on a flat map is deceptive. Two miles across a salt flat requires forty minutes of walking. Two miles that cross three 600-foot ravines can consume four hours. To plan routes accurately, calculate both the horizontal distance and the vertical gain shown by the contour lines.
Use Naismith's Rule as the baseline formula for mountain walking. Formulated in 1892 by Scottish mountaineer William Naismith, it provides a dependable estimate for a fit hiker carrying a moderate day pack:
- Allow 1 hour for every 3 miles (or 5 kilometers) of forward horizontal progress.
- Add 1 hour for every 2,000 feet (or 600 meters) of vertical elevation ascent.
- Add 30 minutes for every 2,000 feet of steep descent on loose, technical scree or wet roots.
To measure horizontal distance on the map, use a piece of non-stretching cord or the marked edge of a compass baseplate. Lay the cord along the planned route, bending it to follow the curves of the trail or ridgeline. Lay the cord flat against the graphic bar scale at the bottom of the map sheet to read the true mileage. Next, count the index contours crossed between your starting point and the destination, multiply by the contour interval, and add the vertical time to the flat travel time.
| Trail Distance | Total Elevation Gain | Flat Walking Time | Vertical Ascent Time | Total Minimum Time |
|---|---|---|---|---|
| 4.5 miles | 800 feet | 1 hour 30 min | 24 min | 1 hour 54 min |
| 6.0 miles | 2,400 feet | 2 hours 00 min | 1 hour 12 min | 3 hours 12 min |
| 8.5 miles | 3,600 feet | 2 hours 50 min | 1 hour 48 min | 4 hours 38 min |
| 12.0 miles | 5,200 feet | 4 hours 00 min | 2 hours 36 min | 6 hours 36 min |
These numbers represent raw moving time. They do not account for removing a pack to filter water, stopping for lunch, crossing unbridged streams, or postholing through late-spring snow. For heavily loaded multi-day backpacks or off-trail bushwhacking through alder scrub, reduce your forward speed to 1.5 or 2 miles per hour and add fifteen minutes to every hour of calculated travel time.
Common Mistakes
Avoid these frequent field errors that cause hikers to lose position:
- Holding the compass near metallic gear: Checking a bearing while resting the compass against an internal-frame pack, a trekking pole grip with metal screws, or a radio speaker pulls the needle toward the gear, ruining your line.
- Misreading contour index elevations: Reading numbers upside down turns a 6,400-foot ridge into a valley on a quick glance. Check which side of the text points uphill.
- Forgetting magnetic declination direction: Adding West declination instead of subtracting it doubles your error. If your area has 14 degrees West declination and you adjust the wrong way, your heading will be 28 degrees off.
- Assuming blue lines contain running water: Intermittent streams appear as dotted or dashed blue lines on topographic maps. In late summer or during dry seasons, these beds are bone-dry rock ditches. Never rely on them for drinking water without local ranger confirmation.
- Collapsing scale perception: Hasty navigators mistake a tiny 40-foot knob for a major 800-foot summit spur because the ring shape looks similar. Always check the scale bar and count the actual lines.
Practical Next Steps
Topographic navigation is a physical skill that degrades without practice. Begin by ordering the printed 7.5-minute USGS quadrangle or regional park map for a local trail you already know well. Store it in a clear, 100-mil waterproof case or seal it inside a heavy-duty ziptop bag; paper dissolved by rain or split by heavy wind is useless in an emergency.
Take your map and compass to a local park or state forest with hilly terrain. Leave your phone in your pocket on airplane mode. Walk the trails while keeping the map oriented continuously in your hands. Identify three spurs, two stream gullies, and a saddle on the ground, then match them to the contour patterns on the paper sheet. Calculate your travel times using Naismith's formula and check your watch at each trail junction to refine your personal pace rate. For complex winter travel, alpine mountaineering, or glaciated terrain, seek professional field instruction from certified American Mountain Guides Association (AMGA) instructors or certified wilderness navigation clinics before setting out alone.